
Vehicle Help & Setup Guides
Need help setting up your Wicked Camper? You've come to the right place.
Here you’ll find step-by-step instructions and useful guides to help you operate the vehicles and accessories with confidence.
All content is grouped by vehicle category. Click a section below to view the full instructions.
Desert Sands :
Refrigerator Instructions
12V Fridge & Battery System Guide
Your camper is fitted with a high-quality 12V fridge, a lithium battery, solar power, and a smart DC-DC charging setup to keep things running smoothly. Here's everything you need to know to get the most from your setup.
System Overview:
- Fridge Capacity: 38L (fits up to 50 x 375ml cans)
- Power Draw: 0.5A to 2.75A (depending on use)
- Battery: 100Ah 12V lithium battery
- Solar Panel: 200W solar panel
- Charging: REDARC BCDC1225 - draws power from your alternator and solar to keep your battery topped up
Battery Runtime Guide:
(Approx. hours on full 100Ah charge)
- Light use (0.5A): ~200 hrs (8+ days)
- Average use (1.5A): ~66 hrs (2.5 days)
- Heavy use (2.75A): ~36 hrs (1.5 days)
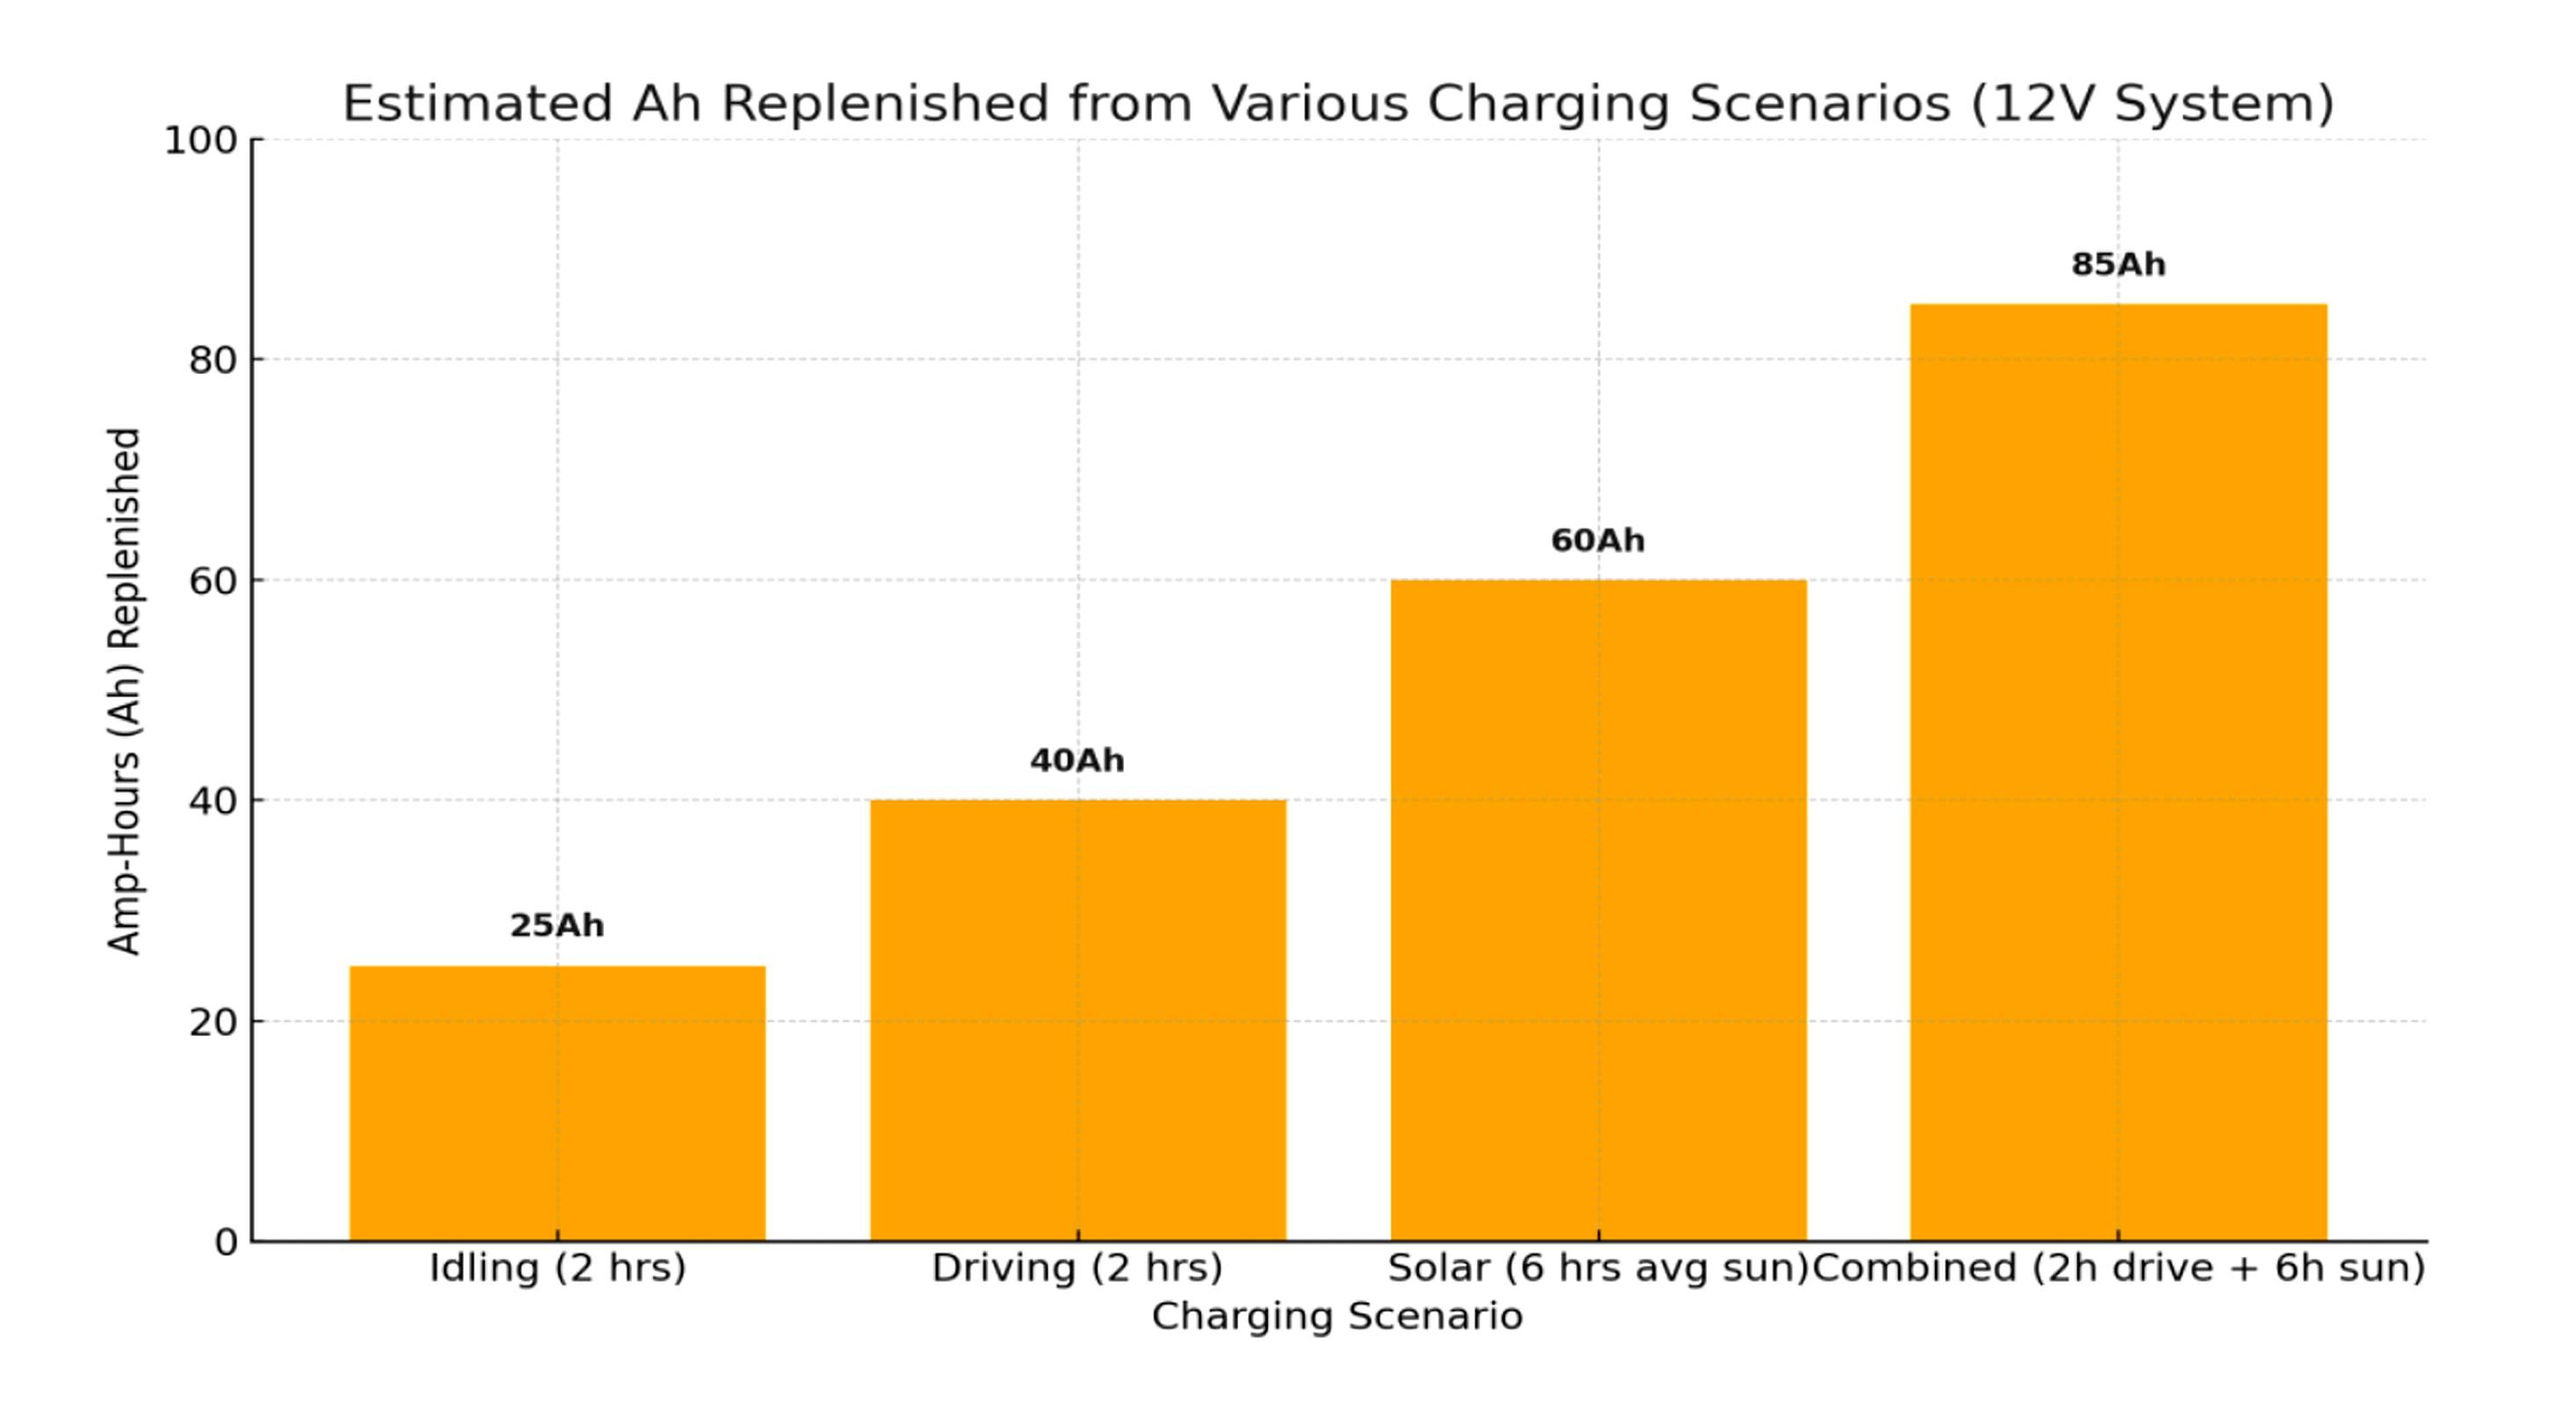
TIP: Combine solar + driving for the best result
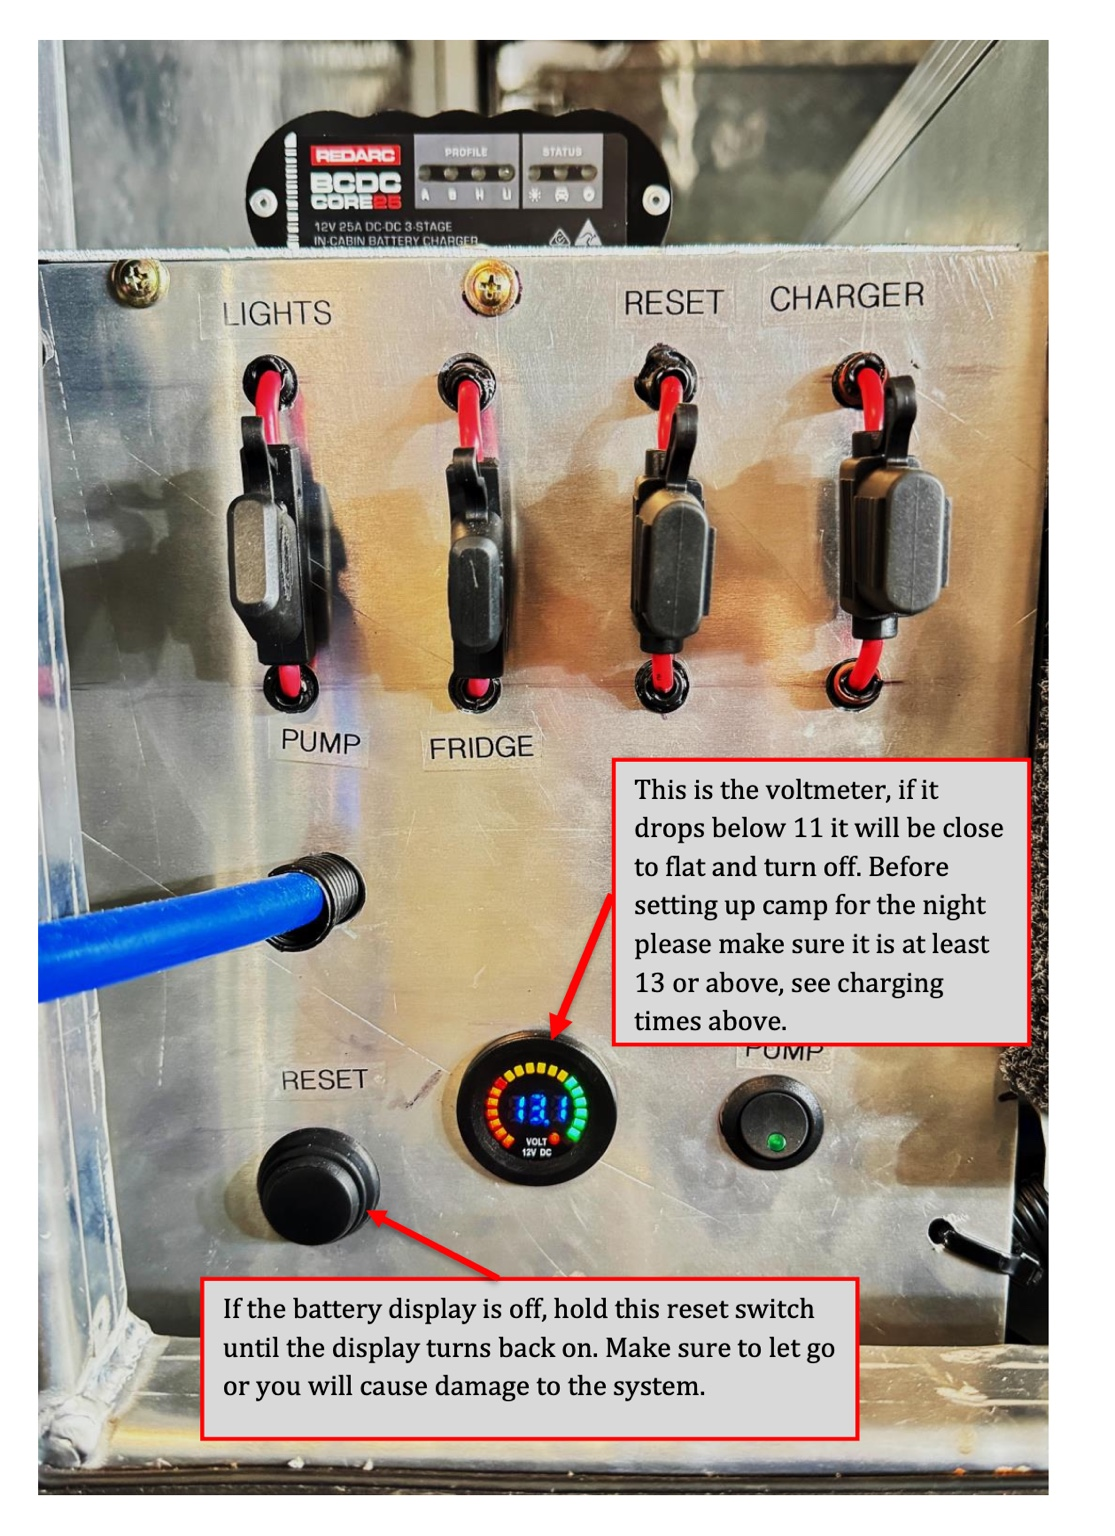
Low Battery Reset Function
If your battery drops too low, the fridge may stop working. Don’t panic! Your camper includes a special reset button:
- If battery voltage drops below 11V, the system may cut power
- Press and hold the Battery Reset Switch (near the fuse box and charger — see picture)
- This will 'wake up' the battery using the car’s starter battery
- The REDARC charger will detect the battery and resume charging
General Tips for Success:
- Drive at least 1–2 hours per day to top up power
- Keep the solar panel in full sun
- Clean dust-off solar panel daily
- Check battery voltage on display panel
Refrigerator
Do not set the temperature setting knob at "5" except when storing frozen products such as frozen food, ice cream and ice.
Overstuffing the refrigerator will result in insufficient cooling from poor circulation of cool air and may spoil the stored foods. Keep some spaces between the foods where possible.
If possible, purchase pre-cooled food and drinks before putting them into the refrigerator. This refrigerator is not capable of cooling food and drink in a short time. If not pre-cooled, then ensure a long drive ahead as the fridge will need a lot of power to cool items down and if parked up in camp especially overnight, it could cause the battery to drop dangerously low in power.
Turn the temperature setting knob to change the temperature inside the refrigerator. 2 is recommended unless it is hot outside much higher than this — items like drinks will start to freeze.
*At an ambient temperature of 30℃ with the refrigerator door closed
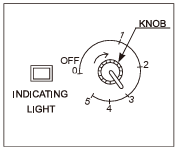
| Temperature setting | Inside temperature* |
|---|---|
| 0 | OFF (Stop) |
| 1 | Approx. 5℃ |
| 2 – 4 | Approx. 0℃ – 12℃ |
| 5 | Approx. -15℃ |
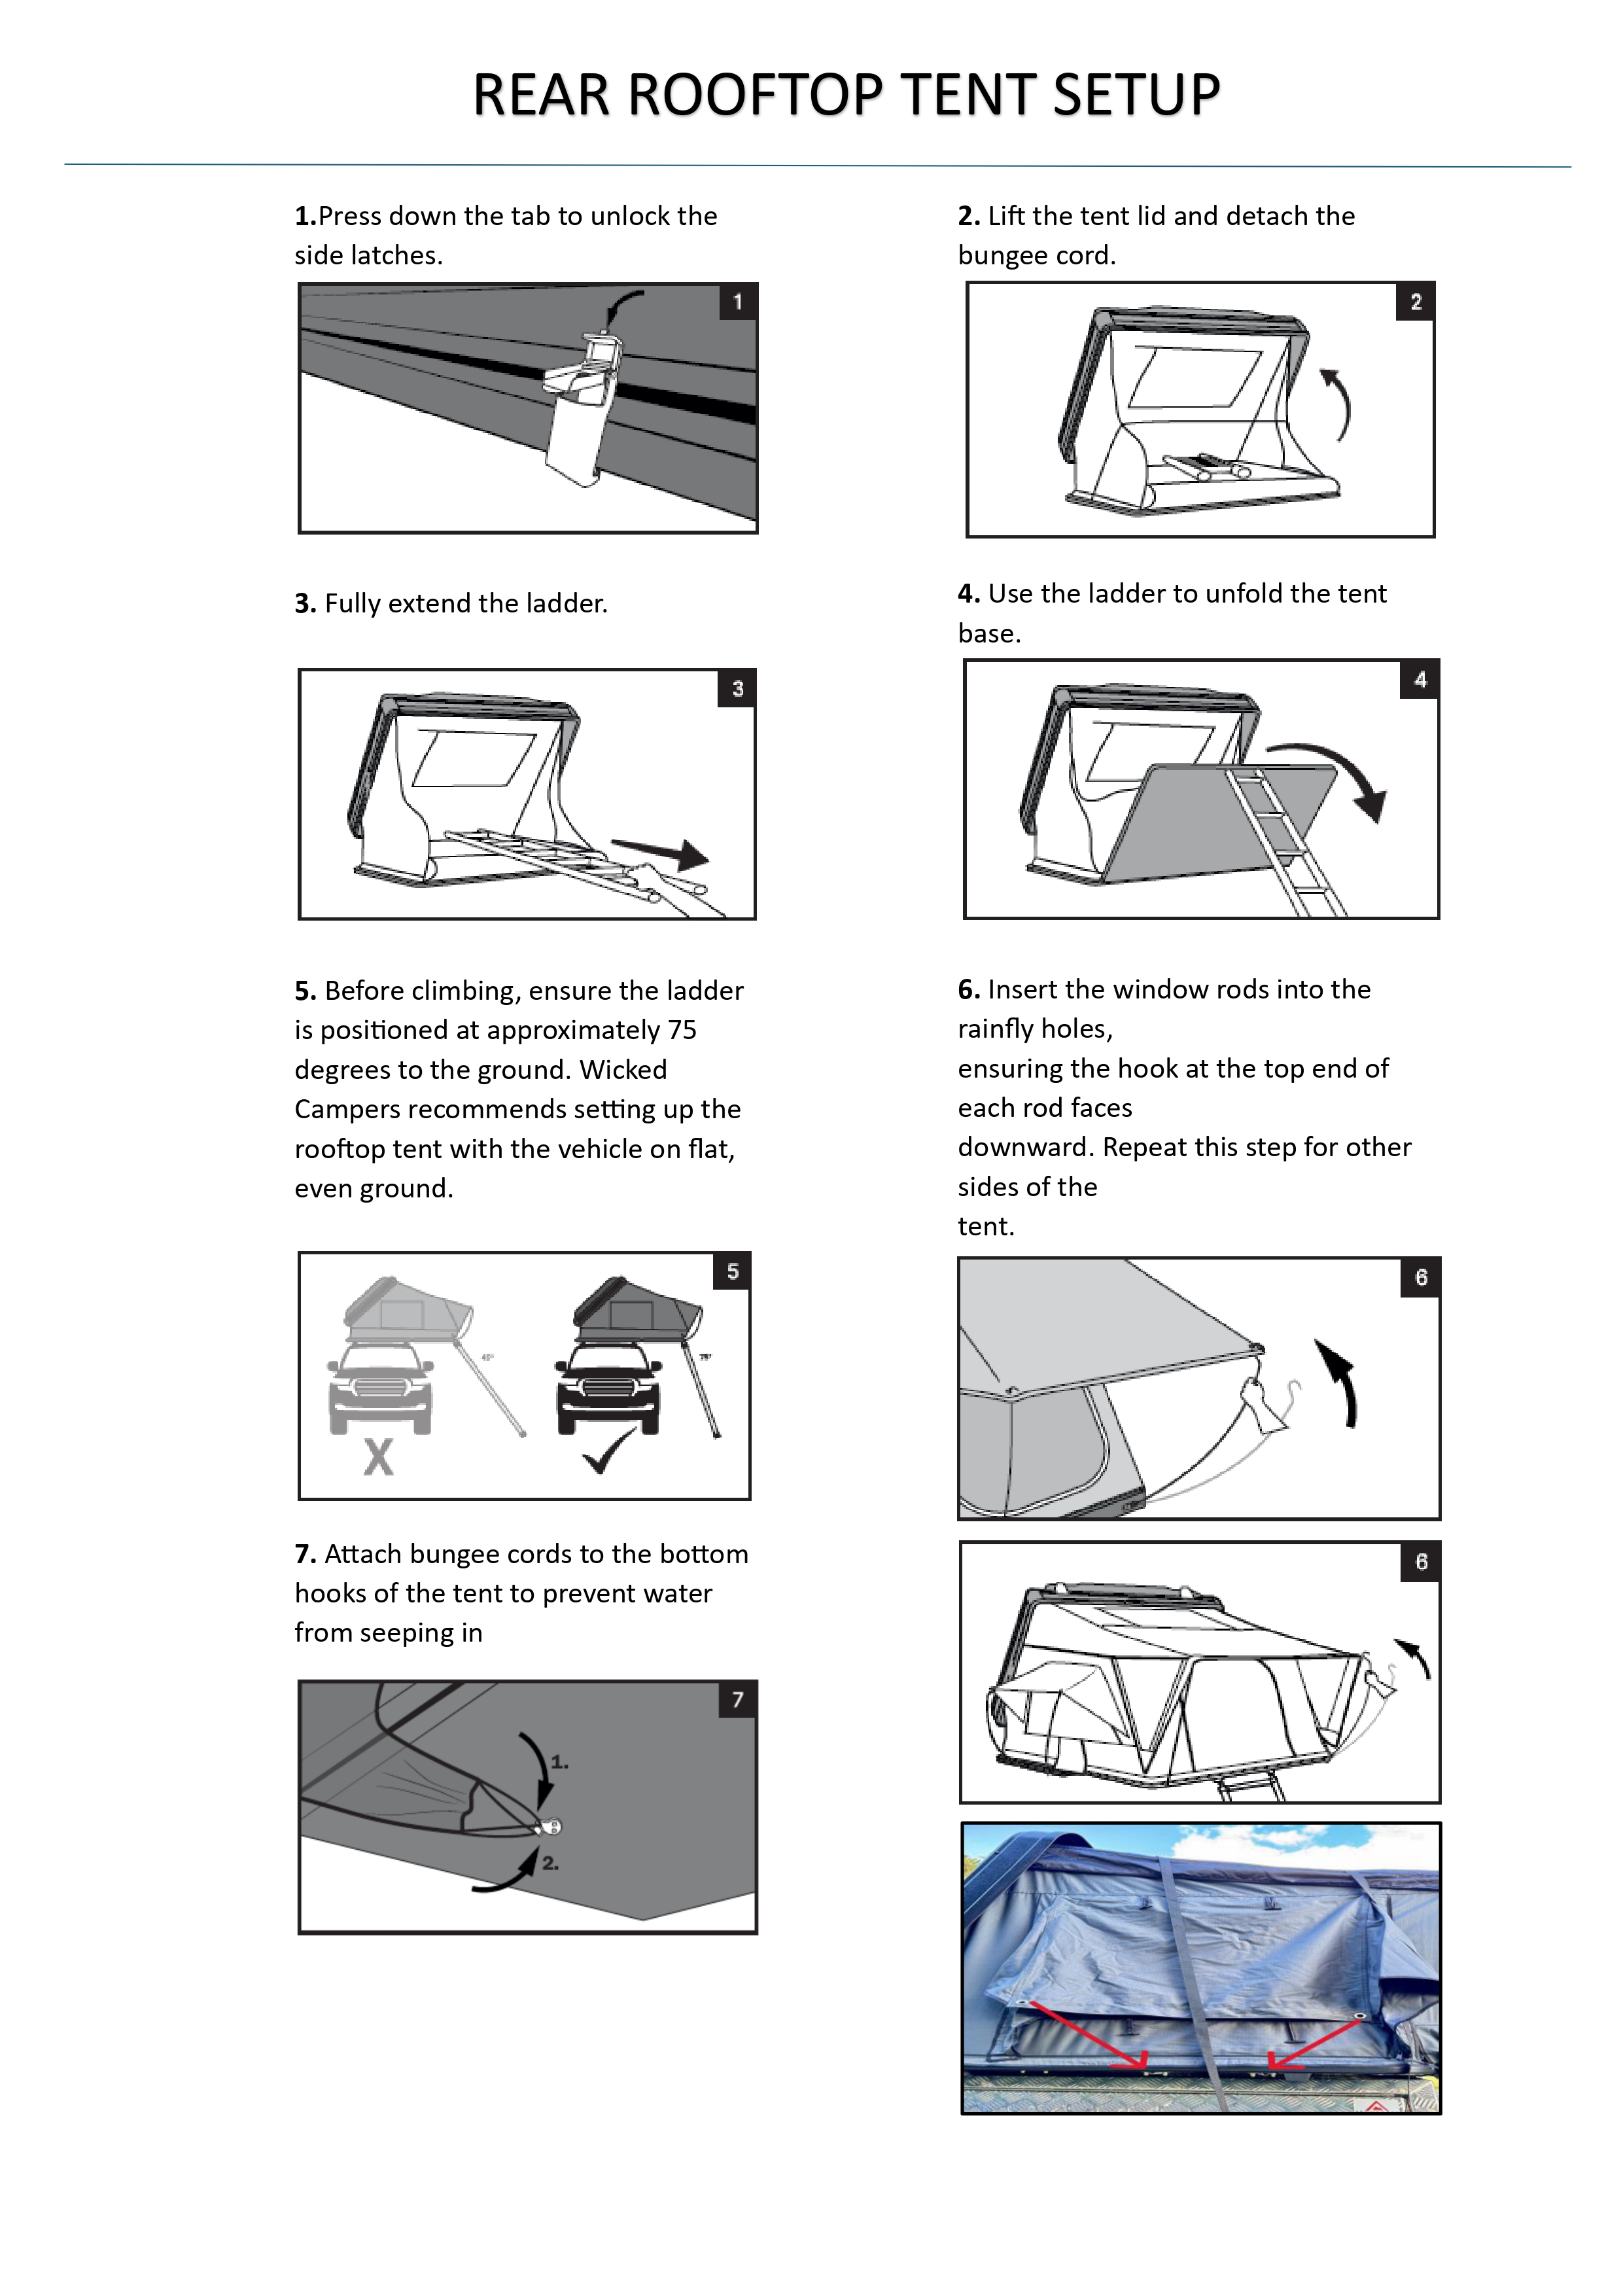
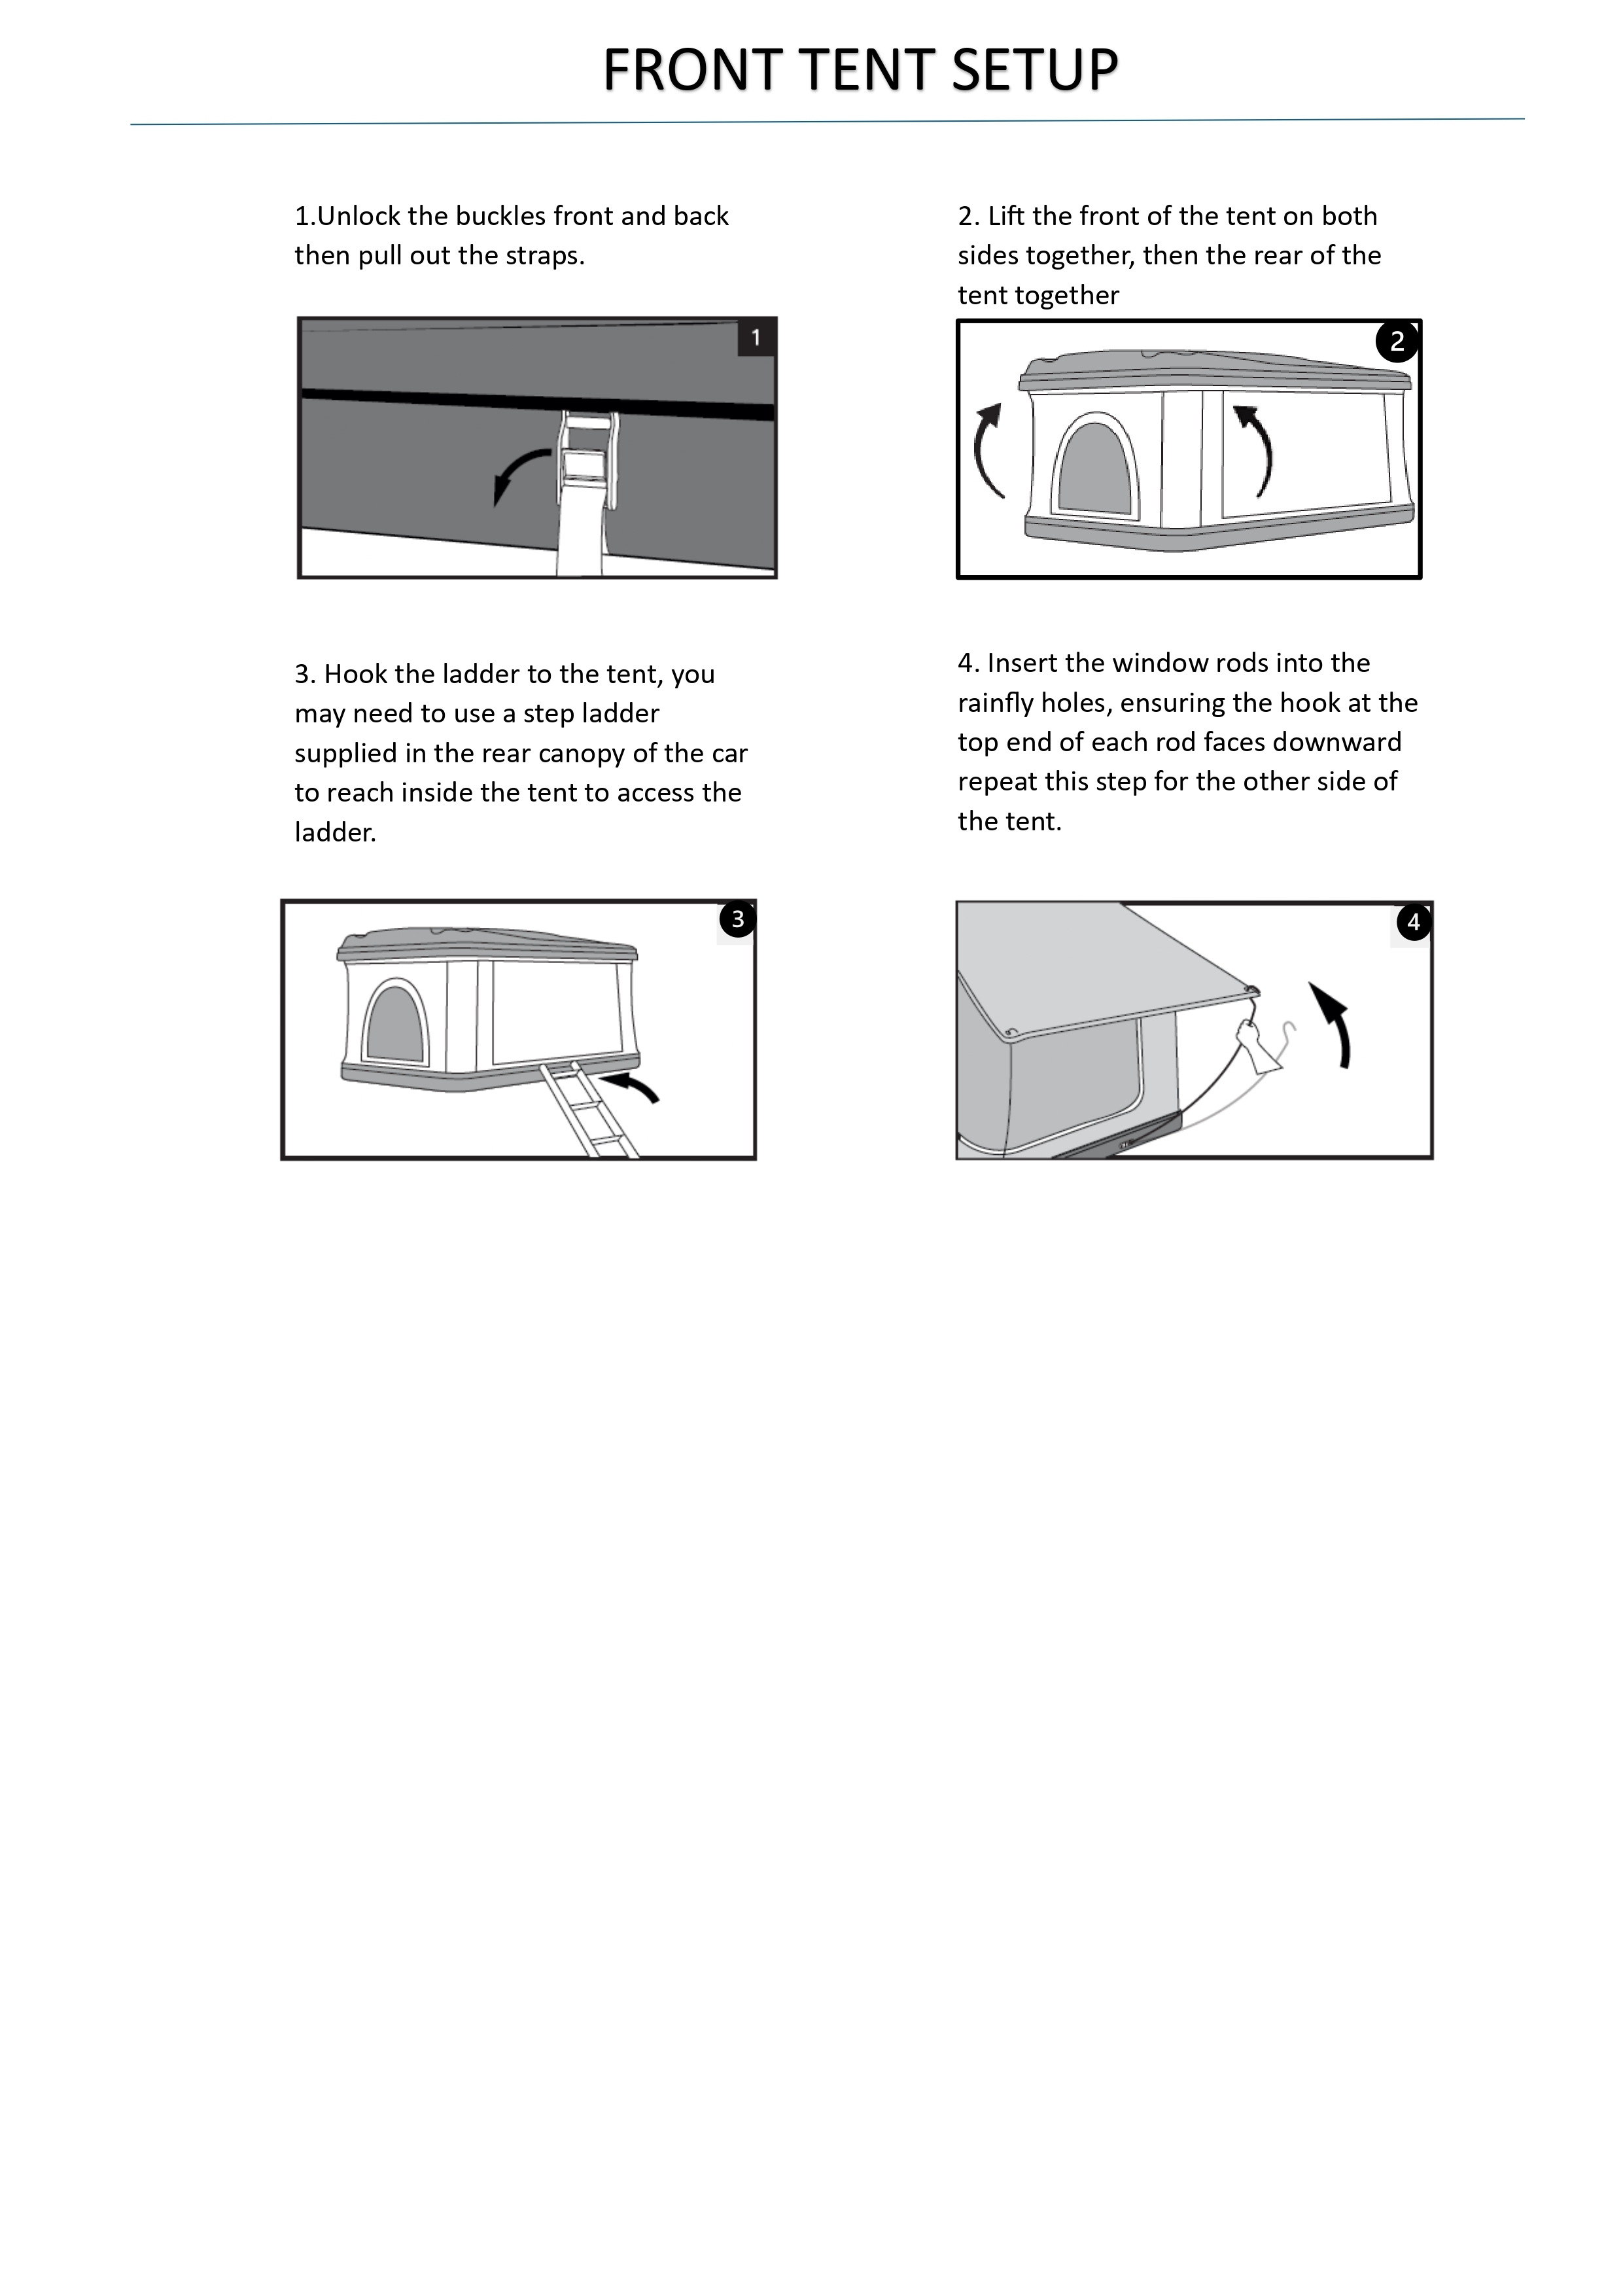
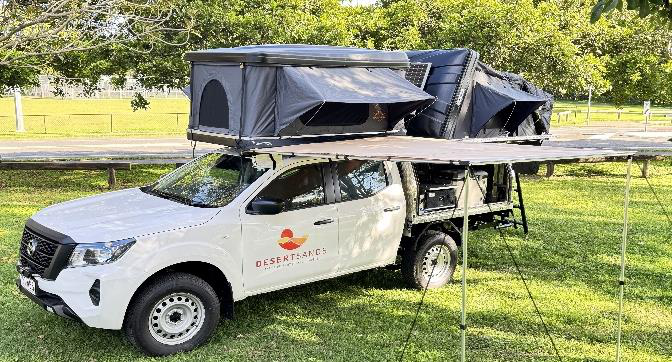
Setting Up Your Rooftop Tent

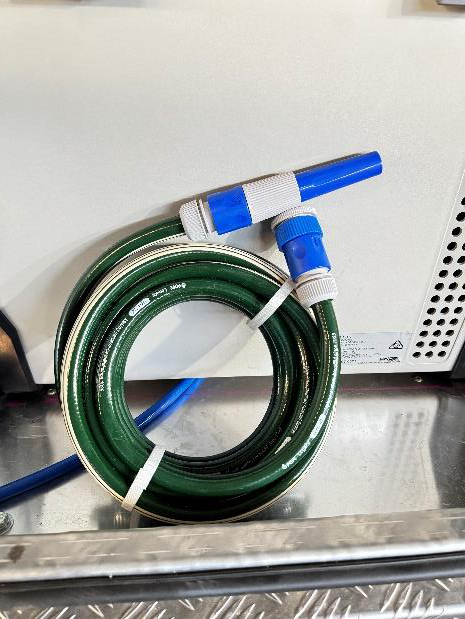
Water Pump Instructions
Instructions:
- Before turning on the pump, make sure the water hose is removed from the back of the car.
- The water pump switch is located next to the drawer in the rear canopy.
- Once turned on, water will flow out with force, so please have your container or vessel ready to avoid wasting water.
- After use, turn the pump off and hang the hose downward to let any excess water drain out before returning it to the car.
- This helps prevent your belongings or electrical equipment from getting wet.

Water Tank Info
This vehicle is fitted with a refillable water tank.
- The water inlet is located on the canopy and marked with a cap labelled “Water.”
- Use the provided hose to refill the tank from any standard tap.
- Please note: The water is not suitable for drinking — it is intended for washing and cleaning purposes only.

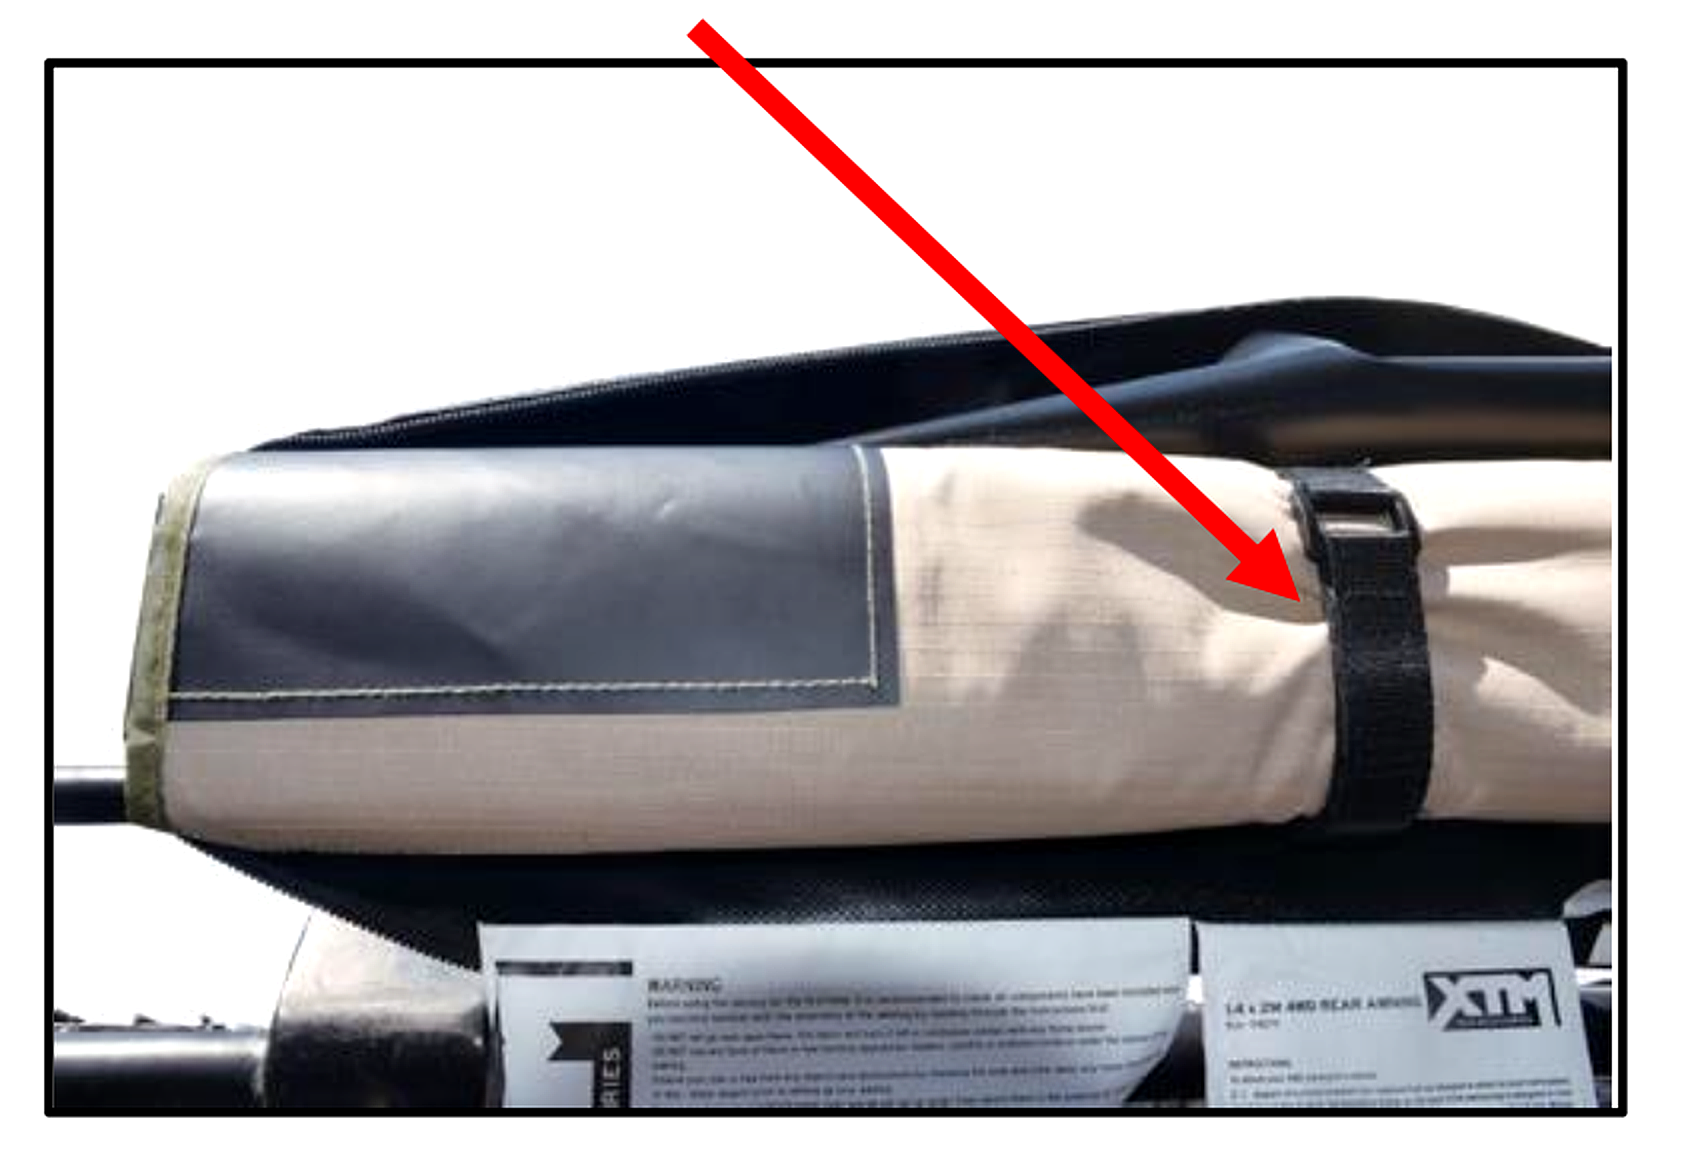
Setting Up Your Awning
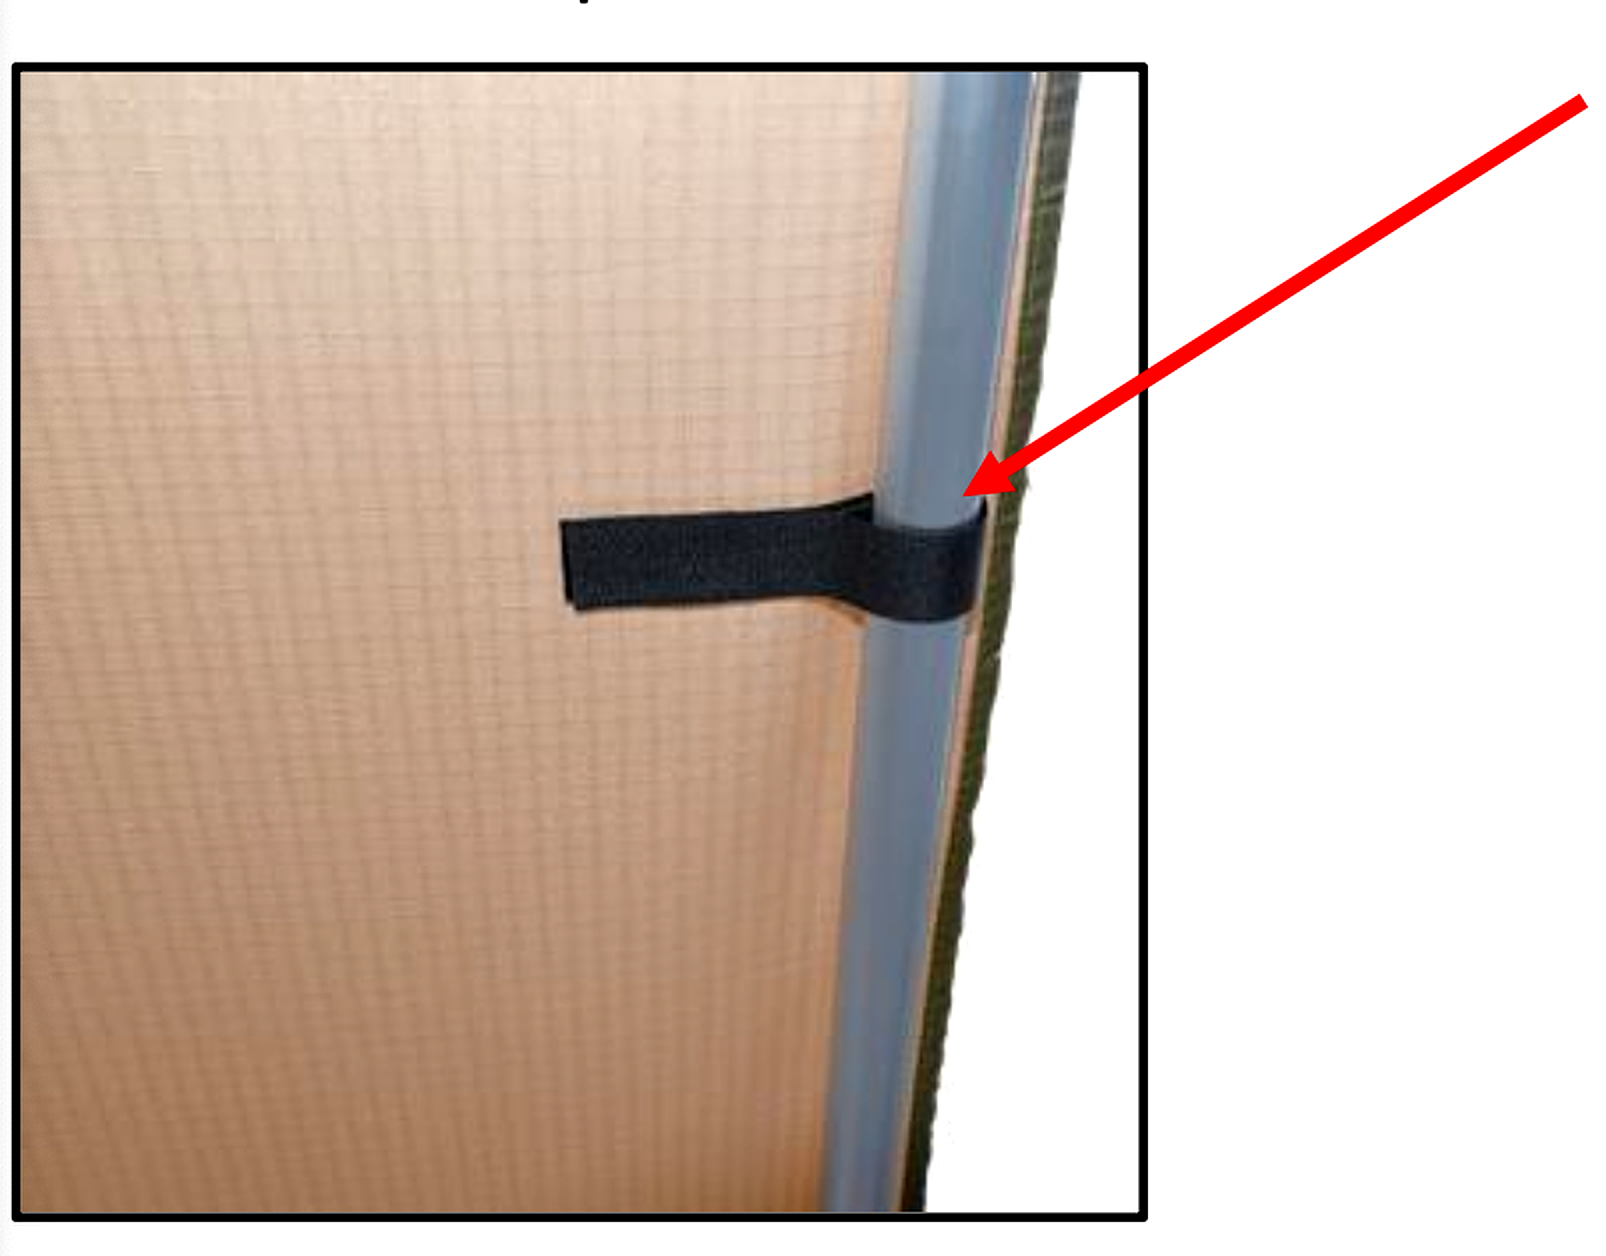
1. Unzip the cover, release the Velcro hook & loop straps and carefully unroll the awning.
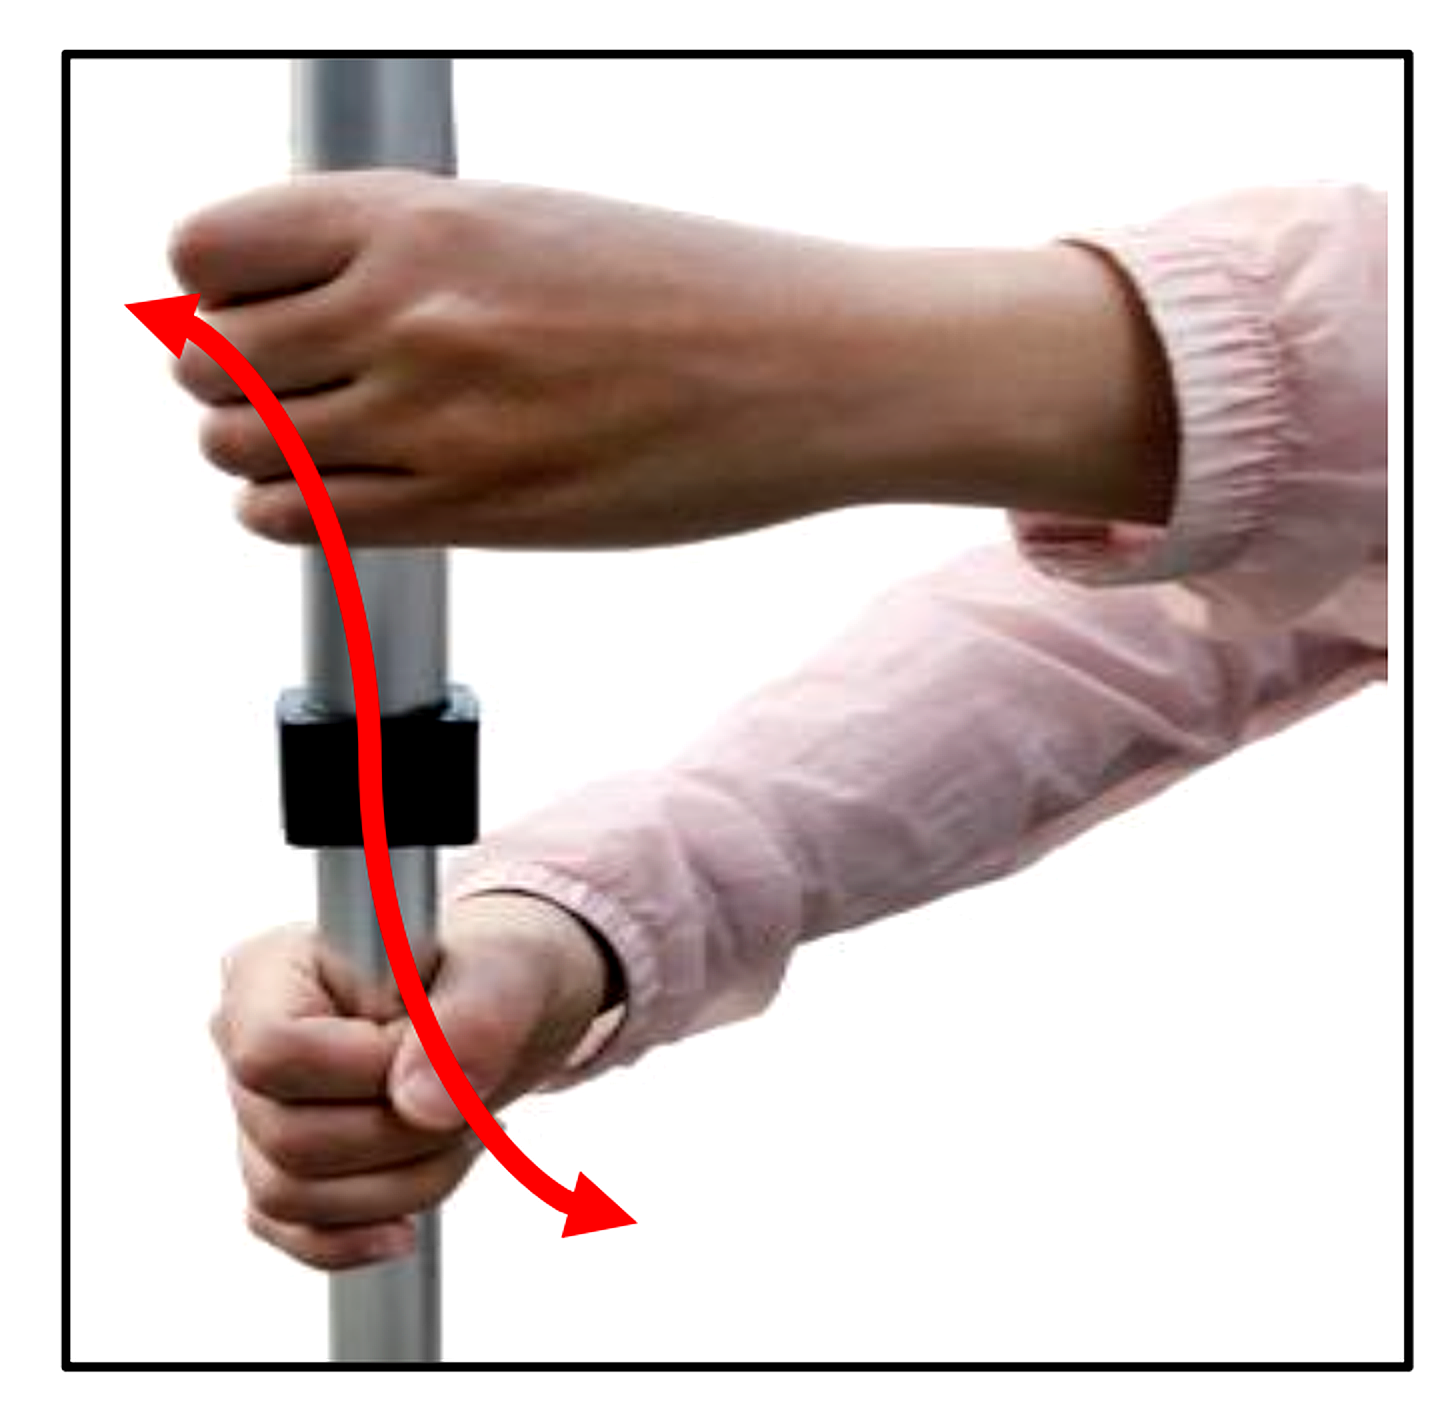
2. Unfold the side poles that are inside the frame attached to the car. Insert the tip of the pole into the hole in the end frame on the awning, extend the poles and twist lock to provide good tension.
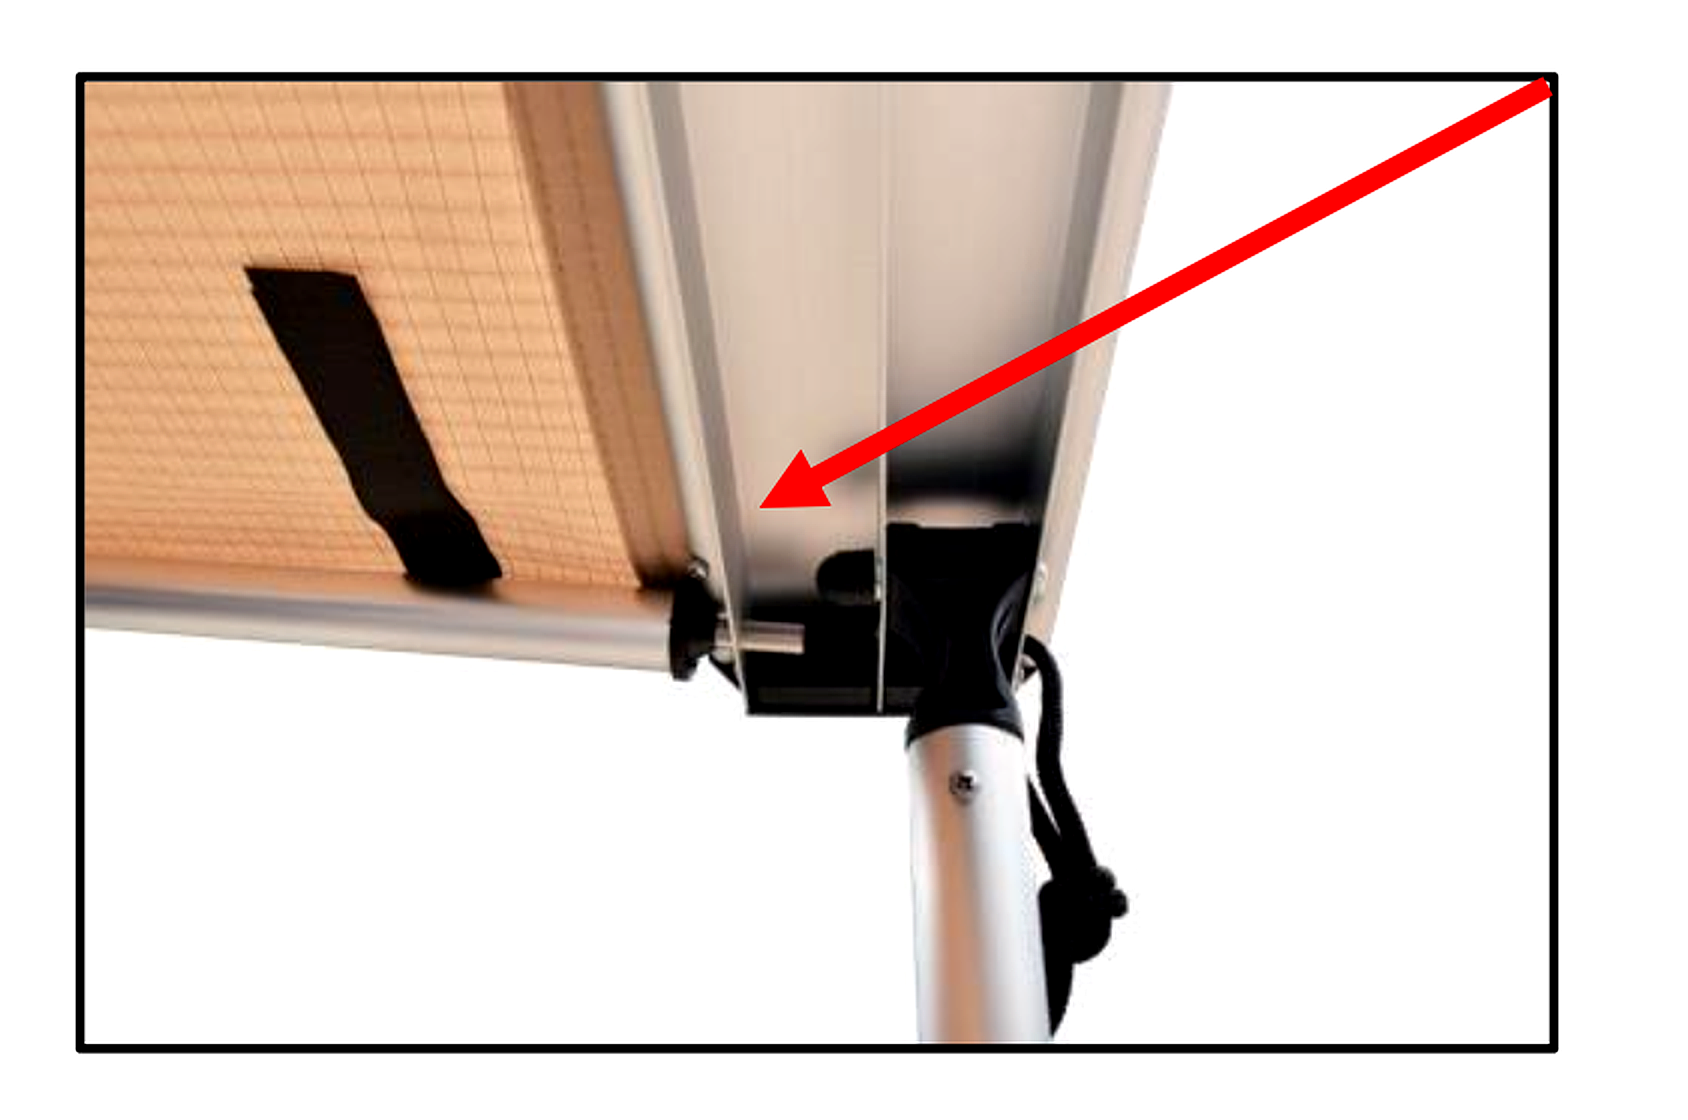
3. The front awning poles are located inside the front frame of the awning. With the help of another person, position these poles vertically and twist lock them to the correct height. If rain is forecasted, make sure the awning is on a slight angle away from the car.
4. Secure the side Velcro hook and loop straps around the side poles.
5. Attach the guy ropes to the top of the awning upright poles and peg out the ropes to ensure the awning remains secure and anchored.
6. To pack up the awning, unhook the straps from side poles, untwist the side poles and fold back into the frame closest to the car. Remove pegs and guy ropes, untwist upright poles and fold them back into frame. Roll the awning up, collect all pegs and ropes, place them inside the awning cover, and zip the cover back up.